
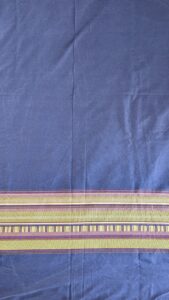
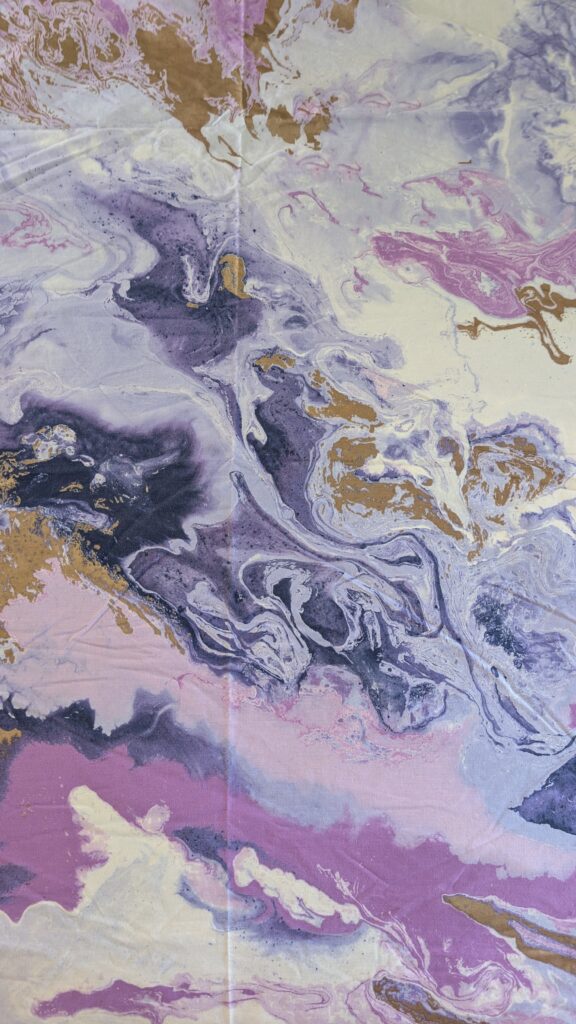
Looking at this doona cover I know it will make a great dress. Let’s make a dress.
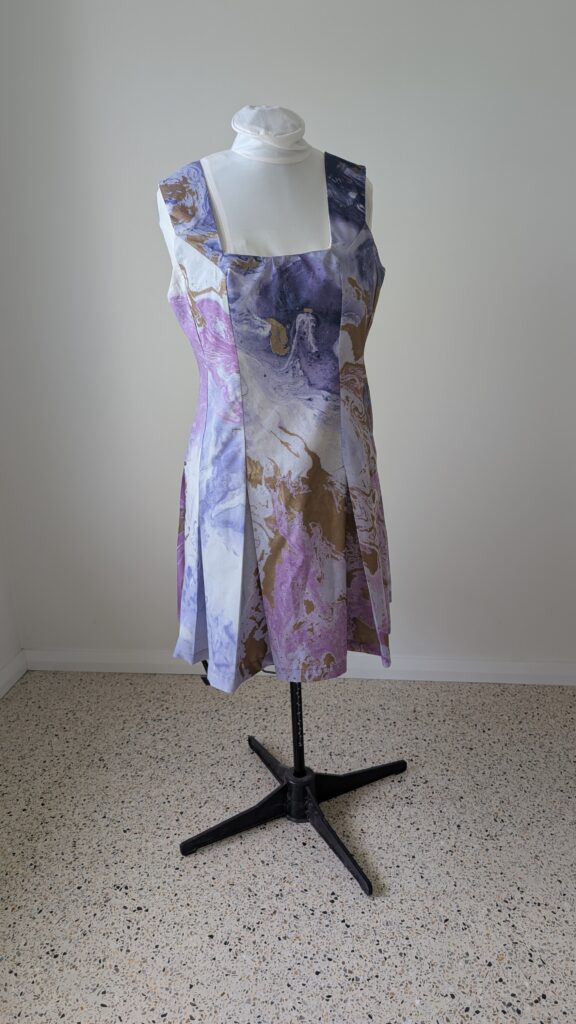
With this dress I want princess seams leading down to pleats. The inspiration came from Pinterest.
2/4/2026
Pattern Drafting
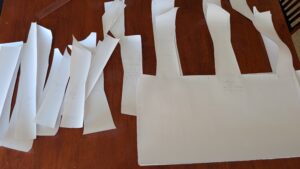
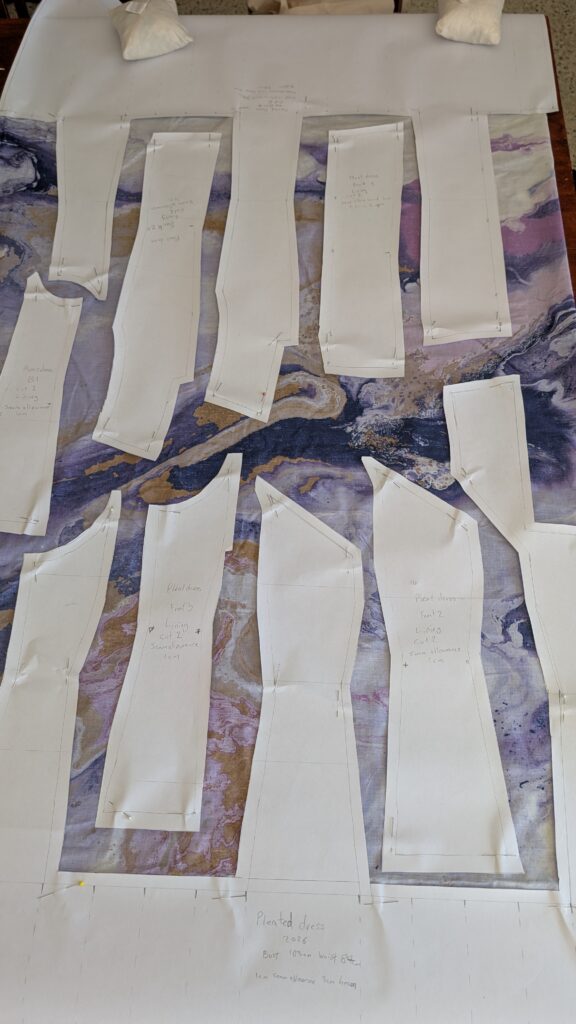
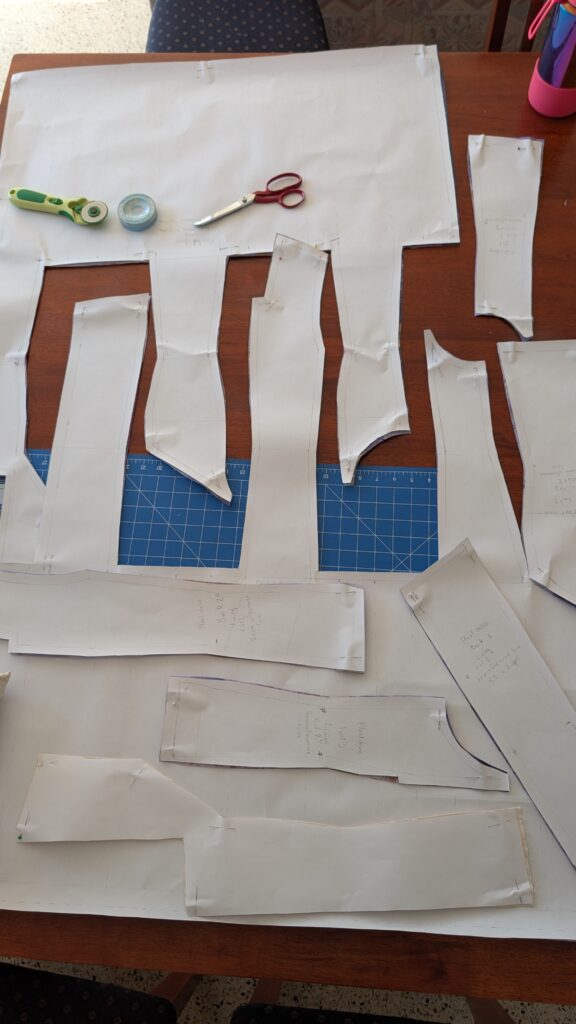
Music is on and I’m playing KSHMR. Let start with the pattern drafting. I start with tracing my blocks on to the paper. Starting with the front I move the shoulder dart into the armhole. Next, I draw in the neckline. A square neckline could be fun. Lastly, I draw wear I want my princess seams. Then I transfer the new neck details to the back. The shoulder dart can stay. Next, I place the princess seams. Now we cut it out to spread for the pleats. As I was cutting the extra princess seam I realised I should split the dart into two. This means I halve the dart width and put the extra dart in with the new seam. I will need to do this on the back too.
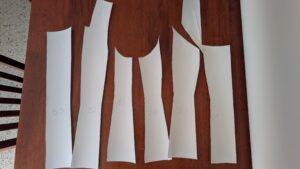
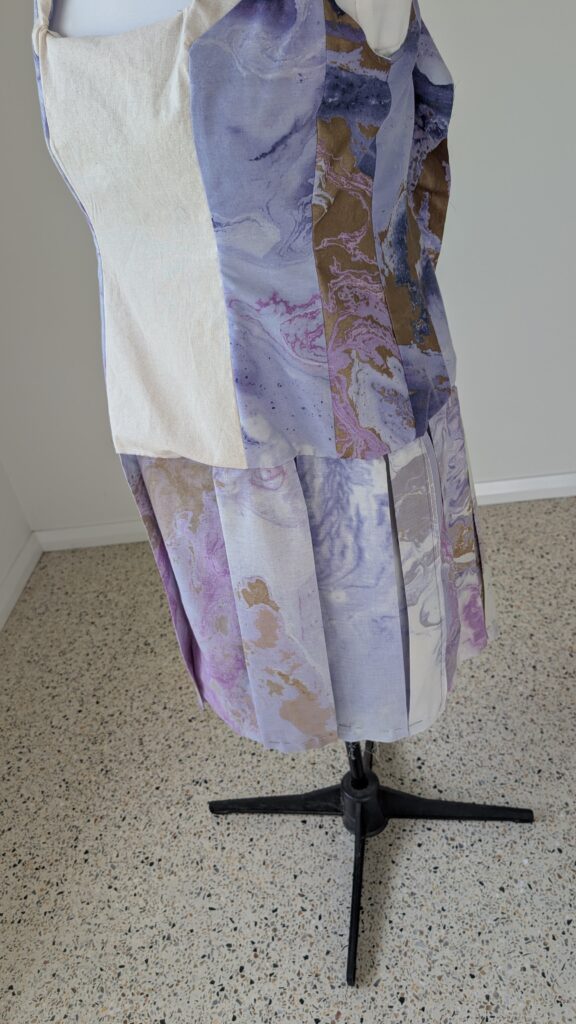
The basics of the dress is set up. Let’s turn into a dress with pleats. The three front pieces was spread about by 20cm. this will give me nice, inverted pleats. The skirt I am wearing has these pleats and is strongly influencing me. I spread out the pattern pieces along a line and trace them down. Next, I chose the skirt length of 40cm and draw that in. This dress is going to take a lot of fabric. Followed by drawing in the fold lines for the pleat. I add a hem of 3cm and seam allowance of 1cm. Most importantly I marked the centre fold and wrote down the details. I still need to decide where I want the zipper. Not sure if I can add pockets. Maybe in the future I can include in seam pockets. Also I need to think about the lining of the dress.
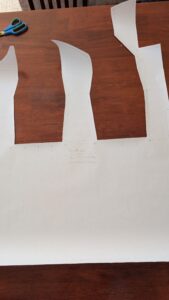
The back is easier. Mostly because I’m repeating what I did on the front. This time I added a 1.5cm seam allowance in the centre back for the zipper. After I cut the pattern I rewarded myself with chocolate.
While working on the back I was thinking about a book I was reading and the lining. How far down do I make the lining? Do I go down to the under bust or all the way down to the hips? I’m leaning towards hips because the pleats can hide details.
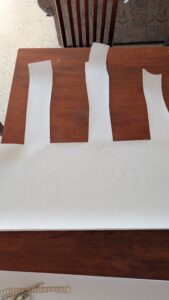
Re using the pieces I made at the beginning, I copied these as the lining. My lining will finish at the hips. So, I can stop getting confused about which pieces goes where I added symbols. I just need to match those up. Then I labelled the pieces. Now all I need to do is clean up and I’m done for today.
3/4/2026
Fabric Choice
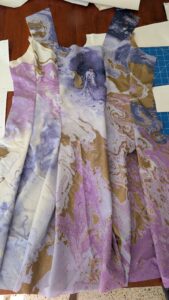
Time to cut the fabric. I was worried that the fabric is too small to make this dress. Yes, it is too small I put the big piece down on the fabric and it doesn’t fit. I will need to go though my stash and pick something else. Don’t worry I can make a different dress with this fabric in the future.
Going through my stash, my best option is an old doona cover we use to use. Now to settle in front over the TV to cut off the edges and remove the buttons. I’ll save the buttons for future use. 5 clear buttons have been saved. Looking at the label it’s a double bed doona from target. The size is a little small. I will make it work.
11/4/2026
Cutting the fabric
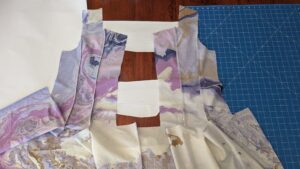
Finally at last I can get back to this dress. After laying down the main pieces on the fabric I got sick. I had to stop sewing for the rest of the day. Yes, it is easier to sew with functional brains.
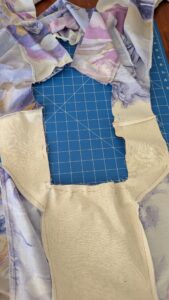
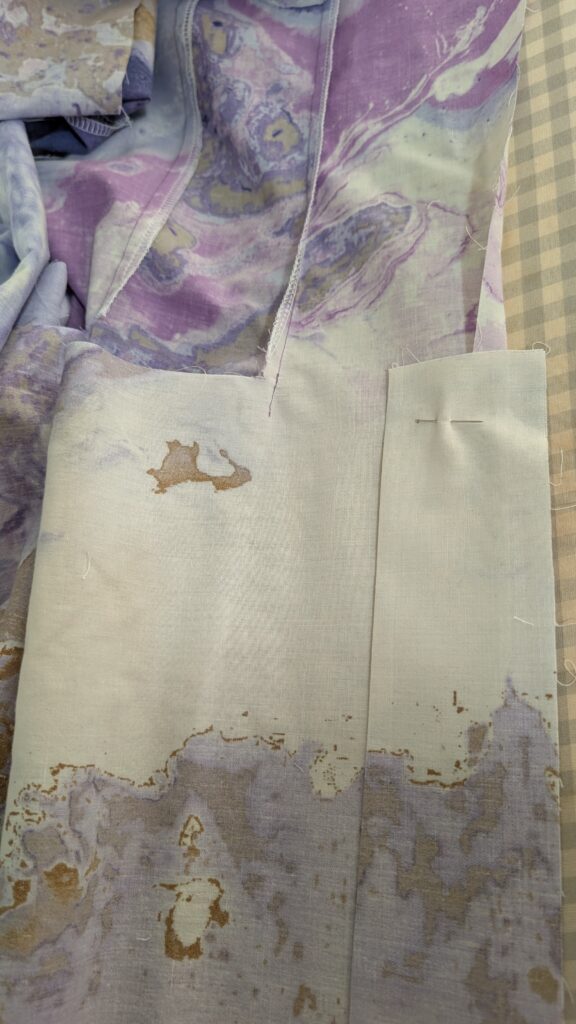
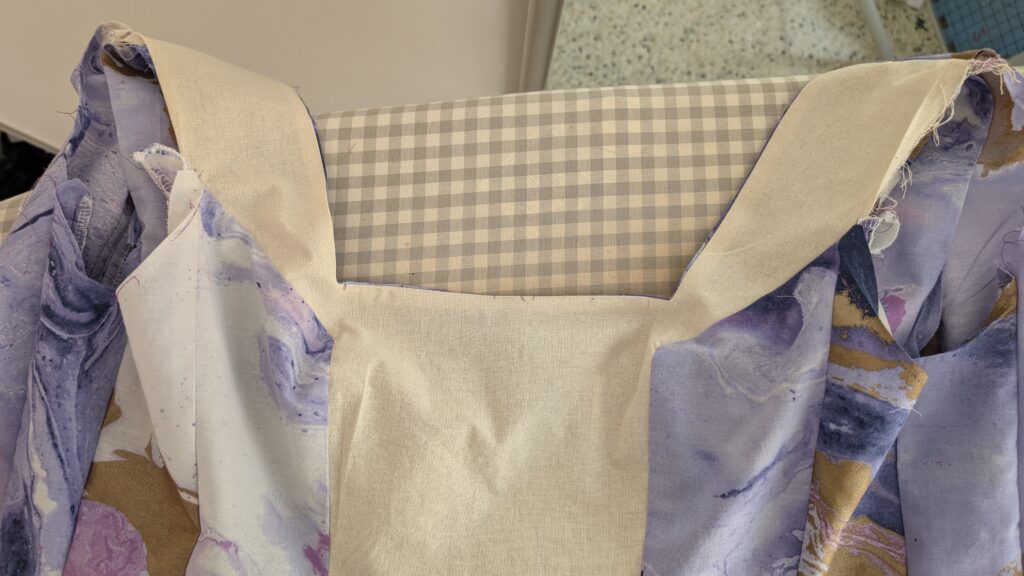
After pinning down the main dress pieces I moved on to the lining. Most of the piece’s fit. Sadly, the centre front lining doesn’t. So, I will use some calico scrap for that. Nobody will know once I’m wearing it.
Sewing the lining
Start off I tread purple thread though the machine. Followed by some testing on the machine. I had to make the stitch length smaller. I’ll start with the lining so I can test the fit.
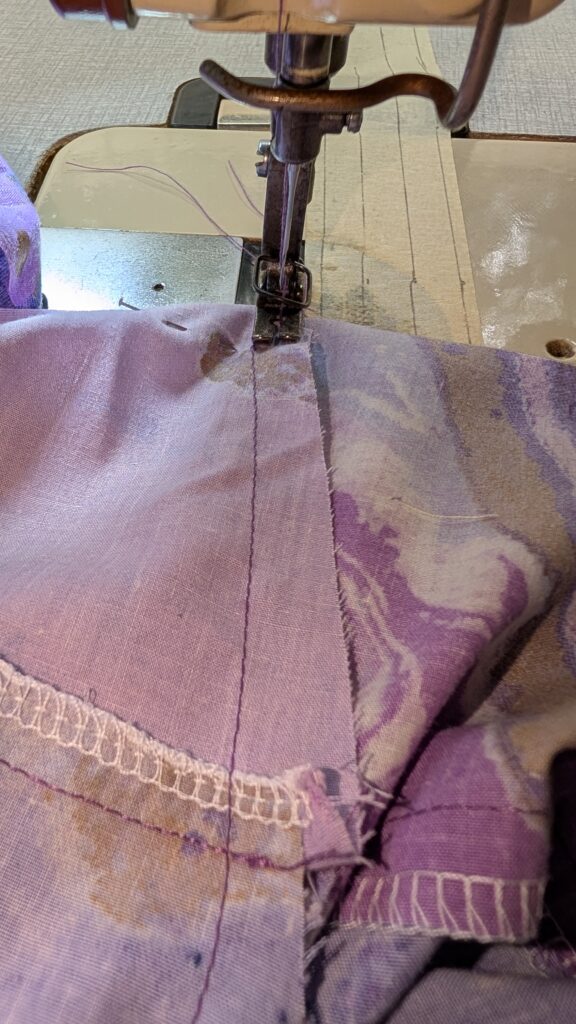
Working from the centre front piece out. I pin and sew it together. After sewing I put the seam though the overlocker. Next I iron the seams towards the sides. With the shoulder seams I ironed those to the front. The main dress I will iron those to the back. This will help smooth out the shoulders.
13/4/2026
Sewing the main dress
With Baby Metal playing in the background I got started on my dress. Starting with the front of the dress I pin the seams together and sew. At one of my corners did sew nicely. I had to unpick it and resew it together. Now it looks a lot smoother. Afterwards I put it though the overlocker and press.
Now for the back. When cutting it out I forgot to cut along the fold line. So, I started there. It is now 2 different pieces. Working one side at I time I pin the first half together and got sewing. The back is simpler than the front. At the overlock I got issues. Accidently got part of the fabric caught. Luckly this was easily resolved by unpicking that little bit. The other side went though more smoothly compared to the other side.
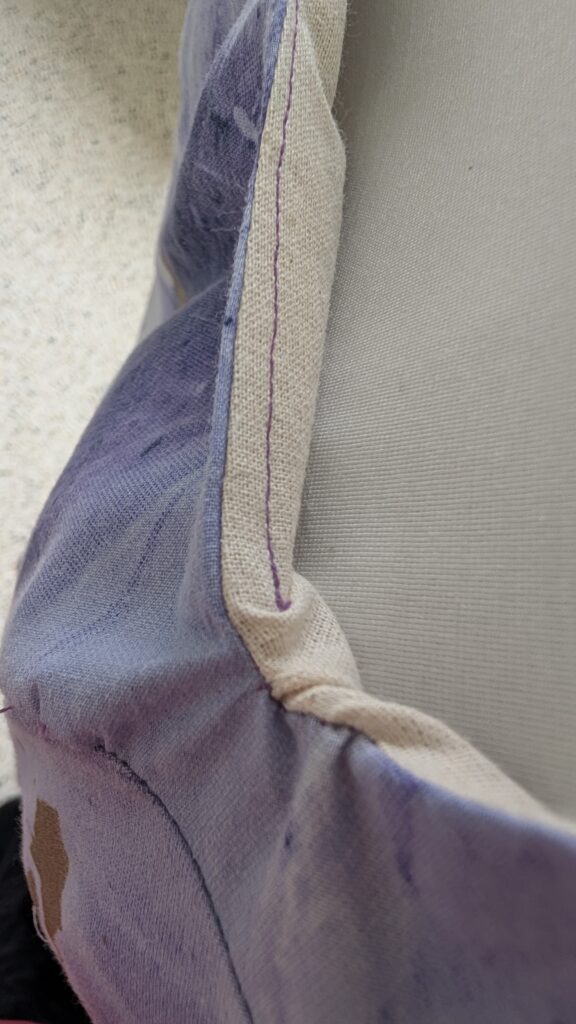
Shoulders are pinned together and sewn. After the overlocker I ironed the seams to the front.
Lining to Dress
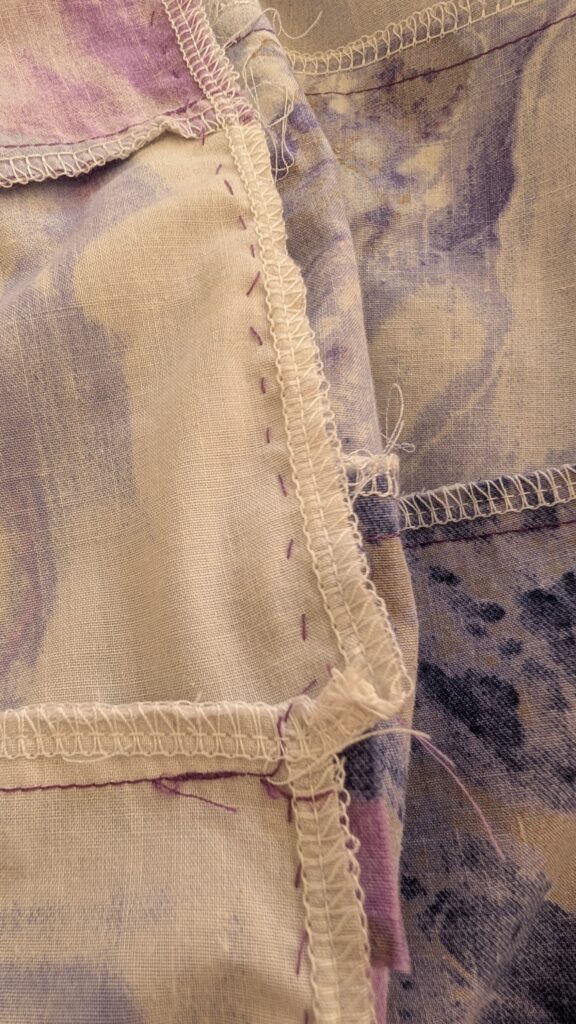
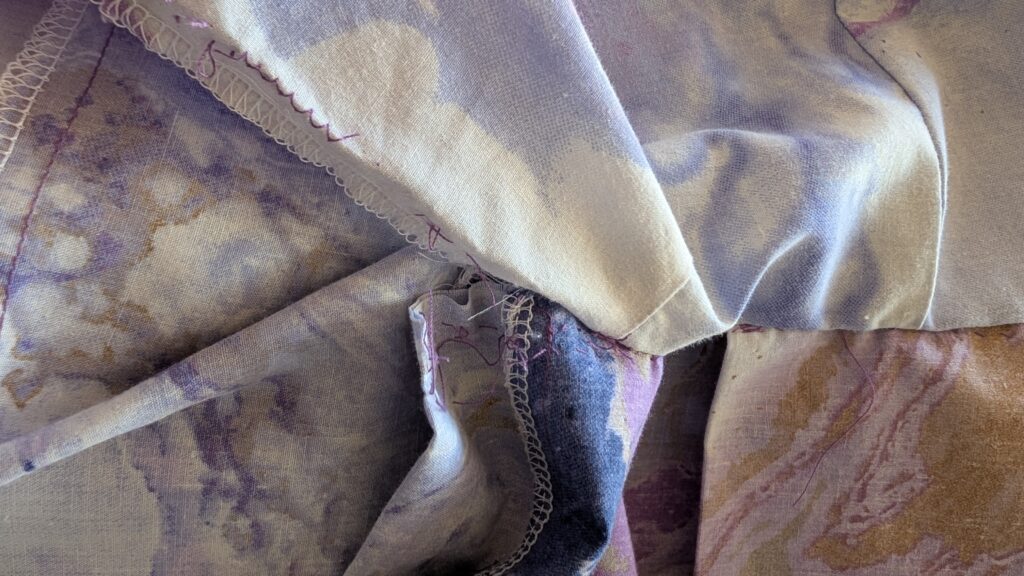
It has been a while since I had to do lining. I want to get this right, so it looks good. I had to research how to do this. I found a blog that did a good job describing how to attach a full lining to a sleeveless dress. Thank you Megan Nielsen. This means I need to start with unpicking the sides of my lining.
Not a fan of unpicking. It means destroying all my hard work. Also unpicking overlocking cusks. This time I tried a different method. I divided the prosses into 3. Starting with the inside seam then going down doing each layer of the overlocker seam. This went so much better. I did rip into the fabric a tiny bit and missing a small chunk. Hopefully I’ll be ok.
After carefully pining the lining to the dress I realised I forgot to overlock the lining. So, I had to unpin and go to the overlocker. It is worth putting it though the overlocker now instead of later.
Back to pinning the lining to the dress and. This time I know what I am doing so it is easier. Then sew at the sewing machine. Here I noticed I am getting tired and making excuses so I am calling it done for today.
17/4/2026
Shopping
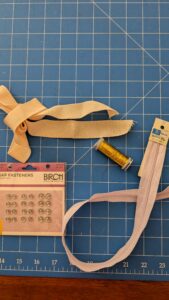
Yesterday after work I made a detour into Spotlight. Here I bought a Zipper. On my pattern I mark down I need a 50cm Zipper. They don’t sell that size, so I bought 51cm. While I was there, I bought cotton tape and press studs. Plus, to make my dress a little fancier I bought gold tread. I couldn’t buy the type I really wanted. I will still have a fun with it. I am planning to add a decorative stitch to the hem. Maybe the shoulders too. First, I need to carry on sewing on the lining.
Finnish Lining the Dress
Last time I sew the lining on to the neckline and armholes. This time I am sewing the seam allowance to the lining, so it doesn’t peek out. I could only do the under arms and bottom of neckline. Next give it a good press. It is looking good.
To make sure the lining stays put I stich in the ditch along the shoulder seam. It’s picking out a little bit.
Side of the dress is next. I pin the side of the lining then the dress. This will be one long seam going from lining to dress. While I was pinning, I also did the skirt area to. Sewing at the machine I also did a back stitch in the underarm area to tough it up. I don’t know if that will help. Using the overlocker I finished the seam. While pressing the seam I notice it didn’t stay flat. Back at the sewing machine I stay stitch in the ditch so it will stay flat. This dress is really coming together. I am getting excited.
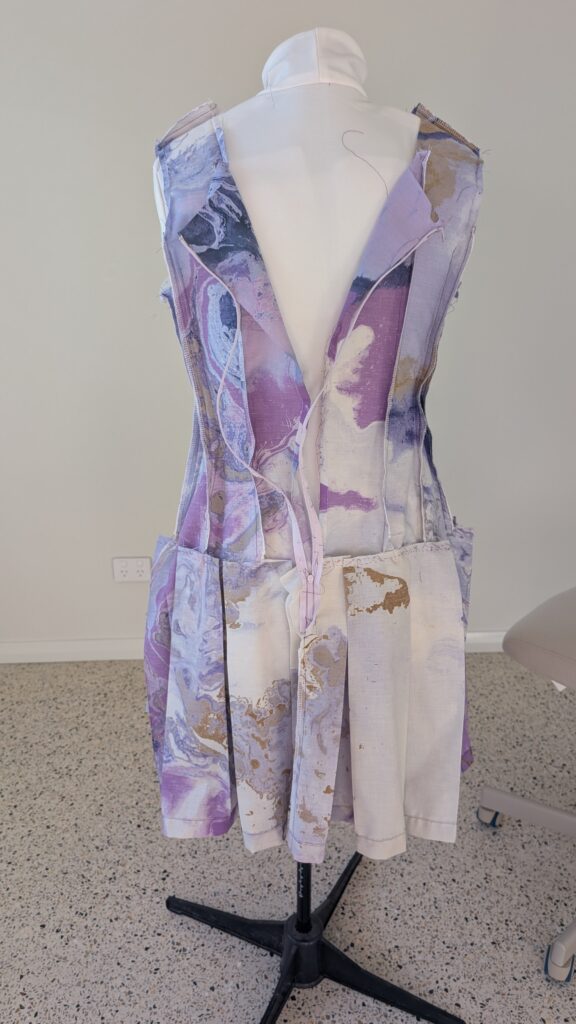
Pleats
It has been a long time since I done pleating. Let’s put the dress down on the ironing board and get started. First pleat starting at the back. I fold the fabric in and press. Then I realise I went the wrong direction. Oops. Iron that out and try again. After a few pleats I worked out a system. I mark the pleats out with pins. Both top and bottom of pleat. Full inverted pleat is 10cm wide with 5cm each side. Fold the fabric and press with iron. Then shift the pins to hold my pleats in place. I wasn’t expecting this to take so long. It took me 2 hours. Listening to my liked songs help passed the time.
23/4/2026
Attaching Lining to Pleats
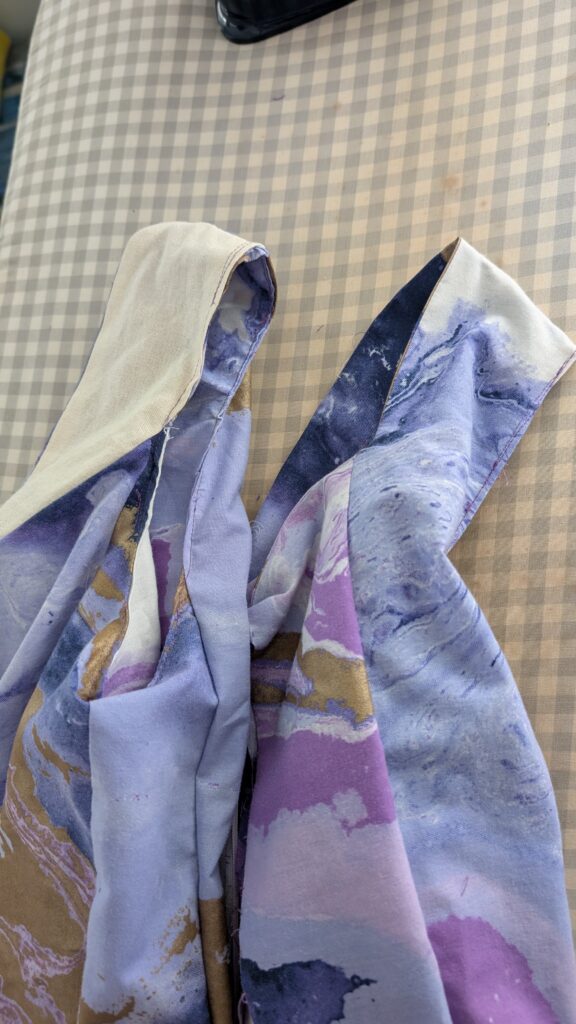
While comfy on the couch watching Sanctuary on Netflix I did my hand sewing. Started with hand sewing my pleats. This way I need to use the pins. Next I hand sew the lining to the pleats. This will help hold my pleats in position. Hand sewing is helping hold it all together for the next step.
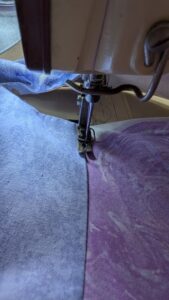
Today I am listening to a new album EIGHT by Hermitude. I turn the dress out though the lining. This will expose my seam. On my domestic machine I do a zigzag stitch to finish attaching lining to pleats. Lucky, I had enough purple thread on my bobbin.
Zipper
Back in front of Netflix, too pin and baste the zipper in. Basting is more secure then pins. I had the zipper sandwich between the lining and dress. Too do this I had to turn the lining out. Lucky, I had the front gap in my lining to make this job easier. Still got scratched by the pins.
Then forced my way off the Netflix and to my sewing machine. Here I rethread the purple thread and swap the foot to my right edge foot. I only did one side of the lined area. Back to Netflix for more Sanctuary, pinning and hand sewing. Because the purple thread is on my machine I used some leftover light purple thread. Since this is hidden in the seams no one will see this. Back to the machine for round two.
Blow the lining I had 9cm of Zipper left. So, I baste that down and sew it in. Thankfully I could keep the right foot in for this. Makes it less fiddly.
24/4/2026
I want to finish the dress today so I can wear it tomorrow.
Finish Zipper
While pressing the zipper and testing the zipper I realised I forgot a step. I need to sew down the fabric, so it doesn’t get caught. Or this will annoy me. With the zipper pulled all the way up I pulled the fabric taught. Using the right edge foot, I sew 1mm away from the edge. This took a lot of careful concertation and slow speed. For the left side I had to swap my foot over to a left edge foot. Of course, the second side was easier. Now the zipper is so much easier to use.
Back Seam
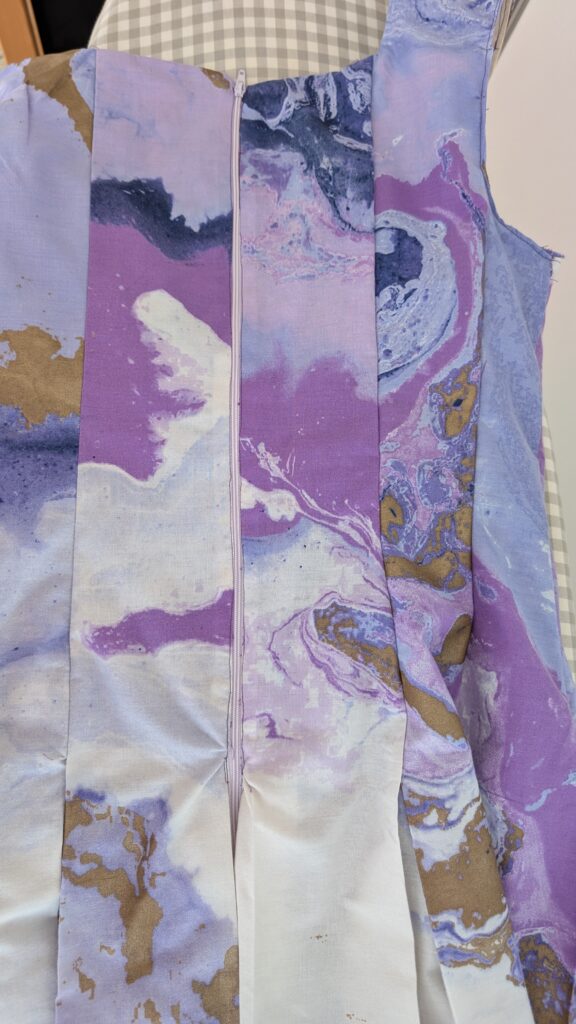
I pin the back seam together. Under the zipper end I mark 2cm down. At the machine, still using the edge foot I saw from the zipper metal end down to my mark and across. This will help make the zipper neat. Next, I change the foot to my regular foot. From where I finished before I sew down to the hem. Leaving 1cm seam allowance. This is followed overlocking the edge.
Hem
With my new iron I learned that it stops working when it overheats. I was forced to take a break. For my hem chose the double fold hem. When I was pressing my hem I eyeball the measurements. My first fold is roughly a centimetre. Pressed and ironed. The second fold is roughly 2cm. Pressed and repined. I only did a straight stitch on my machine. Now my dress is done. Well kind of.
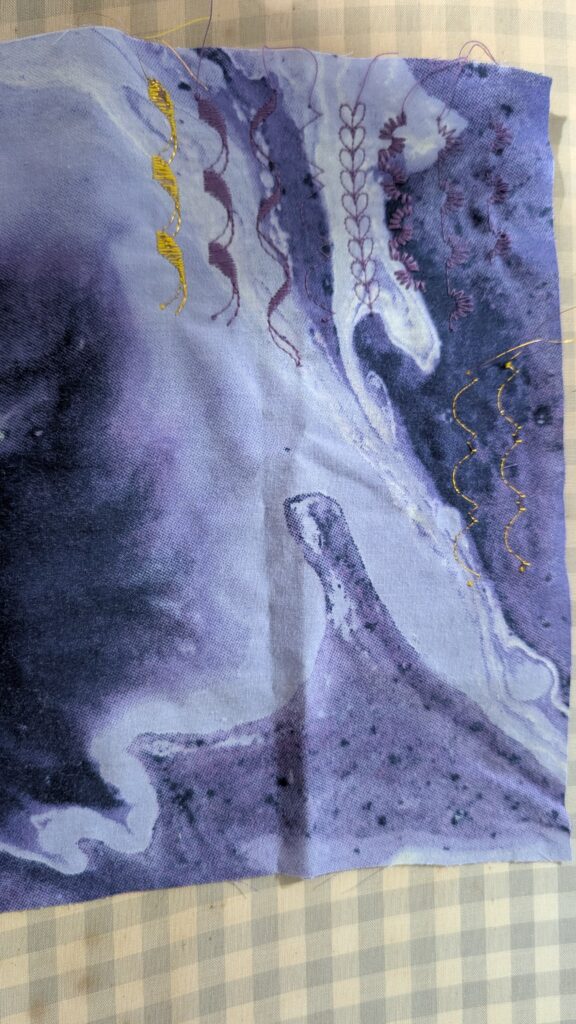
Embroidery
To finish I want a fancy hem. I bought gold thread for this. So, I sat down at my domestic machine with a bit or scrap. Picking out a fancy stitch to use. Starting with purple thread I tested 7 different stitches to use. I chose a wavy rope look. Next to test it out with my new gold thread. I will use a yellow bobbin; I don’t want to waste this thread. Sadly, the thread has been badly wound on to the spool. The machine is strangling to do a nice job. So, I will declare the dress as finished and not do the fancy embroidery.
24/4/2026
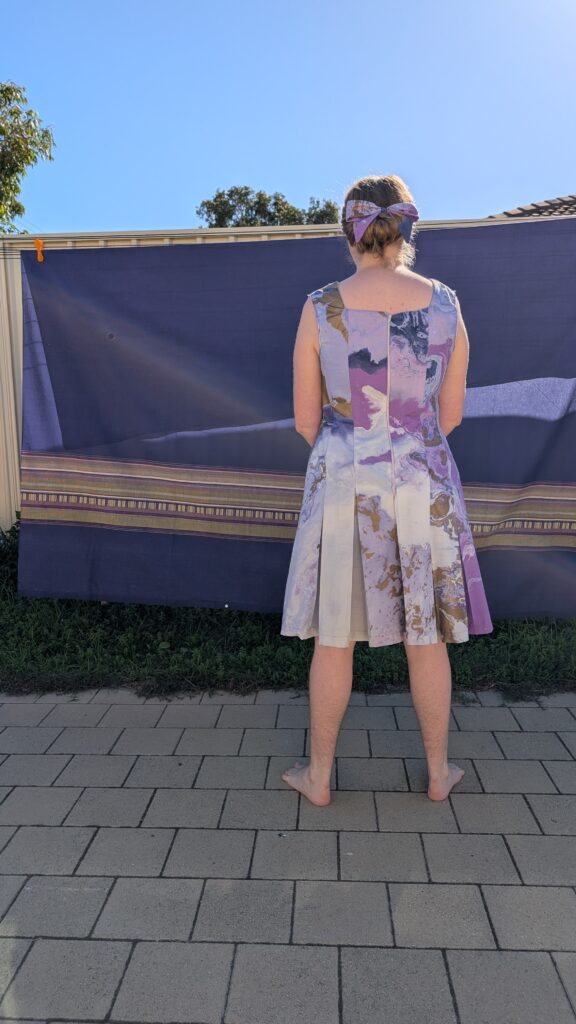
Bow
To finish the out fit I’ll use the scraps to make a hair bow. I was lazy and did no measurements. The longest bit of scrap was near the buttonholes. This part will be ideal; I just need to adapt. First, I cut off the buttonhole stand to double the desired length. I fold this in half right sides together and then fold again. I cut the end at an angle. Another part of the scraps I cut out a small rectangle to make the centre of my bow and help attach to the clip.
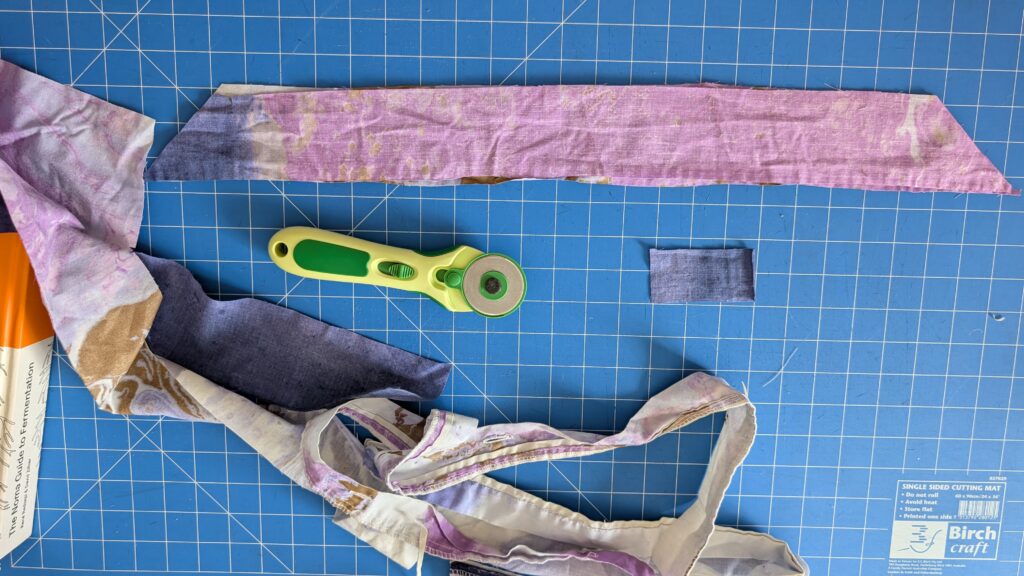
Just before I got sewing, I added a couple of pins to hold the pieces together. Starting with the small rectangle, I fold in the rectangle in half length ways and sew. For the bow I sew around the outside leaving a gap to turn.
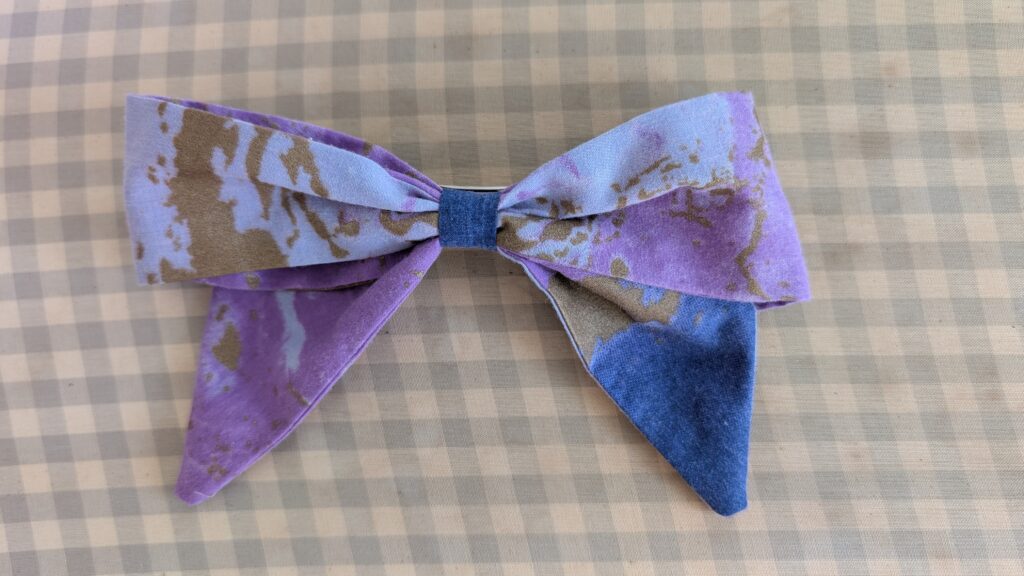
Using a loop turn I turn at the small rectangle and press. This is followed by the Bow. I turn this out and use a chopstick to push the corners out. Followed by a good press. Here I had to be more careful and finger press before ironing. Make sure it’s perfectly flat.
Infront of YouTube a settle down and hand sew the bow. I have done quite a few of these in the past. Gather in the centre. Make the fold the centre of the bow and stitch this into position. I wrap the centre around my bow to hide all my stitching and sew that down. Use the rest of the centre to connect the metal barrette hair clip. Finally sew the ends of the clip to the bow. It looks so good.
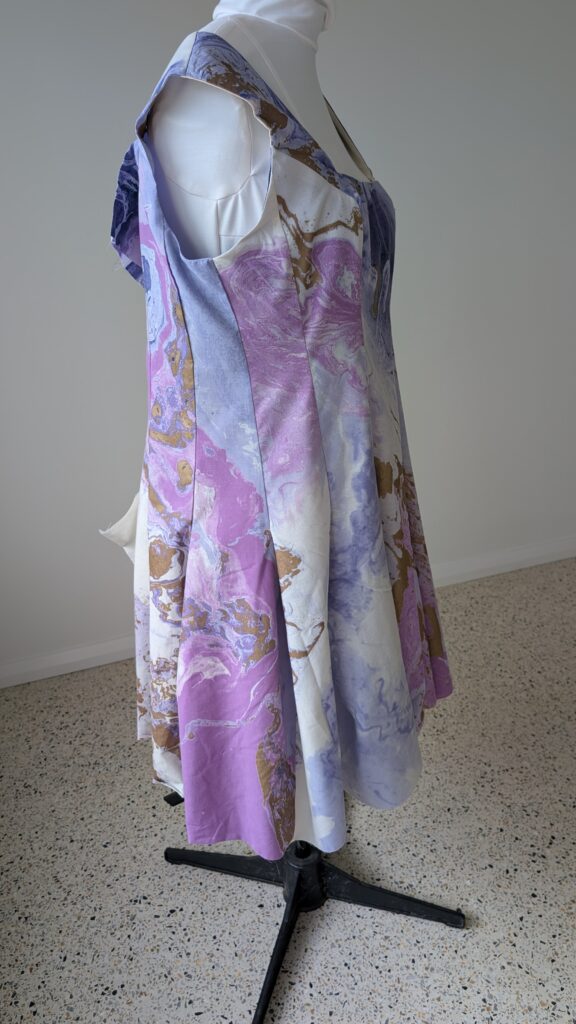
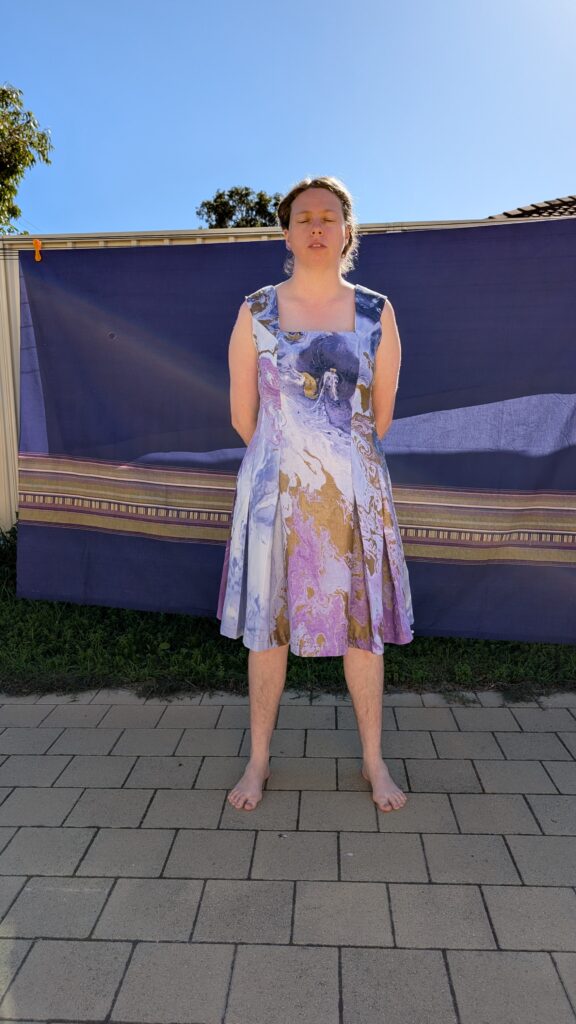
I put the dress on to go out with friends, and it doesn’t fit. The dress is too big. It is so wide on me. This makes the dress uncomfortable. My mother held it up to herself and it is too small for her. The only answer is unpick the dress and so it smaller. To unpick the dress for resizing means undoing half my work. I am so frustrated. So, I am going to put this aside and start another project. I may fix this in the future. Also, the weather has changed. Now it is too cold to wear the dress.
11/5/2026
Fixing the dress
Today I have some electricians over, installing solar panels and battery. YAYY!! This means the power is getting turned off. So, I will be using this time to save my pleated dress.
To begin with I unpicked the lining from the pleated edge. Thank you YouTube for background noise.
At the mannequin I started to pin the seams. Now I realis that if I want to do a good job I must keep unpicking. I must completely remove the lining. This hurts. This will take me back to when the dress was halfway done. Oh, the sacrifice’s I must make. I was so proud of how the inside of the dress looks. Back to the couch for more heartbreaking unpicking.
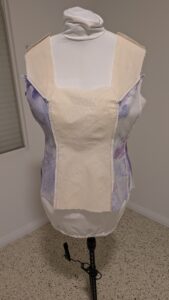
On the mannequin Starting with the lining, I pin the back seam together. Now the hard to work. Pinning into the seams so it fits better. I haven’t done this for so long. Not since I was in Tafe. It took me a while to get the hang of it. Basically, I pinched and pinned the seams evenly around and made use the fabric stayed smooth. Also, this is the first I got to use my mannequin since I covered it with my new Bootstrap cover. I had to be careful not to pinch the cover into my dress.
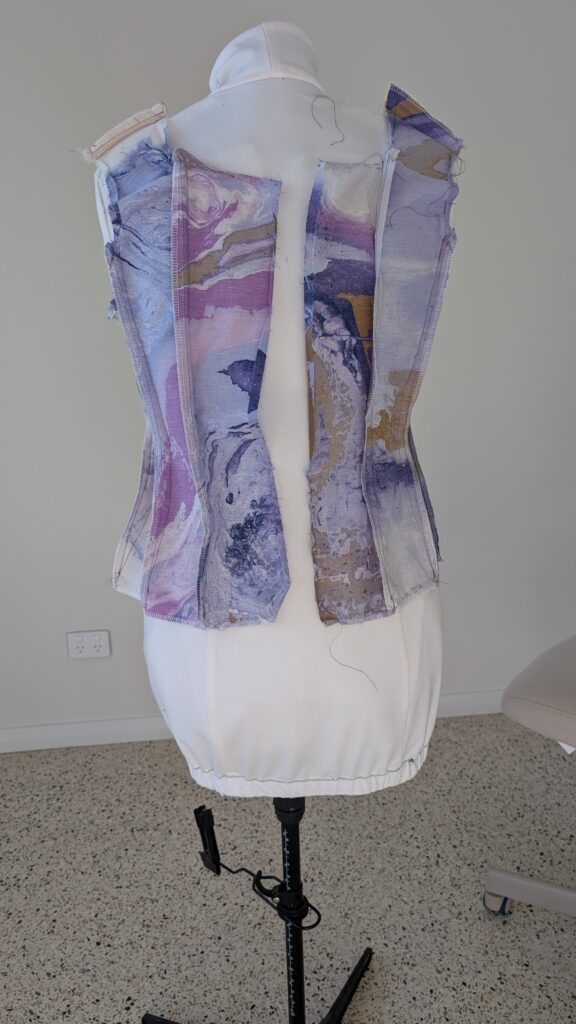
YAYY!! Solar panels and battery are installed. To make sure the pinning is good I got my mother to come round and check to see how it looks on me. I did a good job on the back. We did need to fiddle with the bust darts. I also had to instruct my mother on how to do a neat job. Also, we and to pin the shoulder seams to pull the dress up.
Resewing the seams
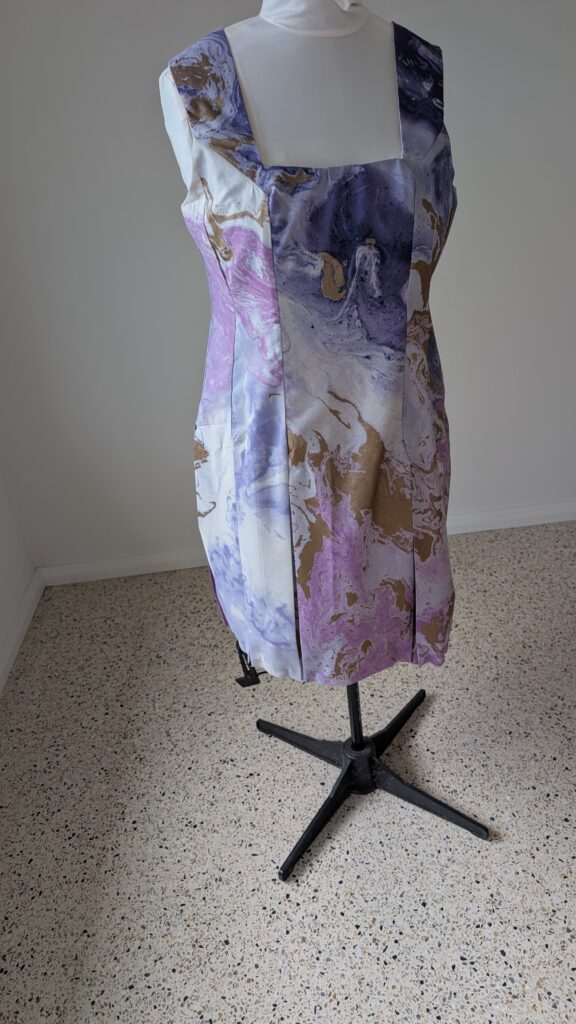
Now I can re sew these seams. Starting with the lining I sew the seams. When I got to the front bust dart The bobbin seam didn’t go though. I ran out of bobbin thread. After winding the bobbins, I can get back to my seams. The lining is done. She is a little tight on the mannequin. It looks better on my body. Hopefully I’ll be ok. I have work too hard to fail now.
Now on to the main dress. This was so much easy since the bobbin was full. I did have to rearrange the shoulder pins because the fabric was bunched up.
14/5/2026
Sewing Lining to Dress Neckline
Need to finish dress again. With A State of Trance by Armin van Burren playing in the background let’s get started. Because of the amount of alterations done on the side seams I wasn’t able to sew on the lining the same way. So, I decided to take short cuts. To avoid this, I should of done a fitting at the beginning. I pinned the lining to the neckline and made sure it was smooth. The shoulder seams I left last because they are bulk. Then did a straight seam at the sewing machine. I skipped sewing the seam allowance down this time. At the iron I pressed the seams and trimmed into the corners, so they sit nicely.
Sewing Lining to Dress Armholes
This was a lot hard. I made it work. It just looks bad. If only I did a fitting at the beginning. Here using the previously pressed seamline I followed that. Making use that it is pressed in and a smooth line. There is some gaping that I had to make work. At the machine I sewed close to the edge as possible. About 3mm roughly. Making sure things went smoothly I went slow, removed pins at last possible moment. Afterwards I checked more work. A couple of spots I had to go over. I am calling it done for today. I am craving sweets, so I am going to sneak out and buy some.
20/5/2026
Redo Zipper.
Finally, I have time to sew again. Starting with installing the zipper. Starting on one side I pin the zipper sandwich between the main fabric and lining. Shipping the hand sewing this time.
A bit of good news is a now have a screwdriver for my industrial sewing machine. With screwdriver for each sewing machine, I am less likely to lose one. They can stay with their machine.
Sewing it in was easier then expected. If I hand baste the zipper in before and it would be easier. At the iron I press the seams. This will help protect the fabric from getting caught. Next, we move on to the other side. After both sides are pressed and ironed, I take it back to the machine. Even though I ironed in to place I will sew it down. Just millimetres from the fold of the fabric I sew it down. I didn’t do a good job, and I can see the wiggle.
Finished
It is done. The final step was sewing the lining the dress. My partner is back home and a distraction, so I didn’t blog that. The dress is so much better fitted. I am so much happier with this.
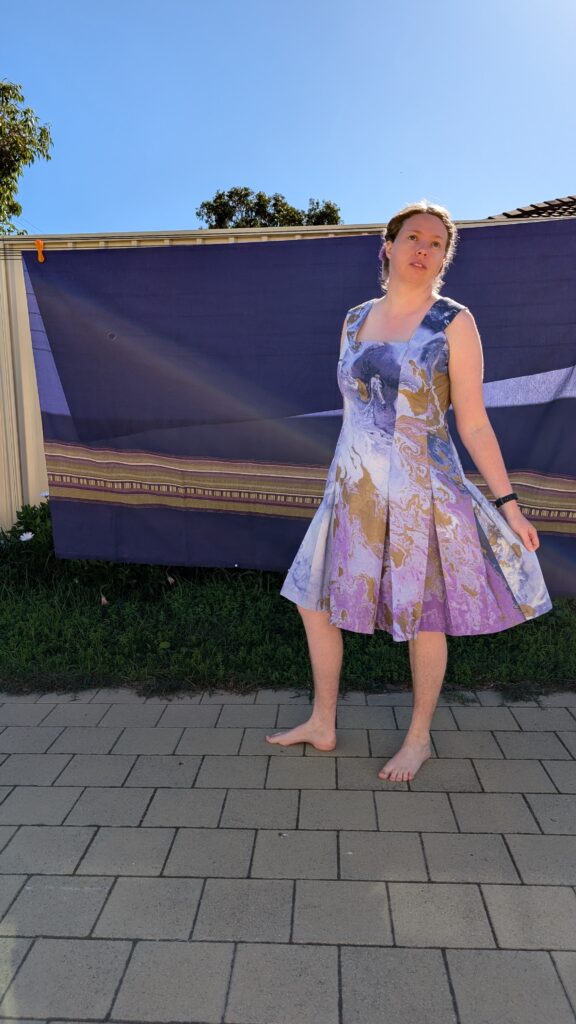
What I need to learn from this dress is do the fittings. I did try on the lining and thought I would be ok. Next time I will bast the side seams and try it on beforehand. Also, I need to learn why my dress got so wide. I did split and ad new darts. Is this where I went wrong?
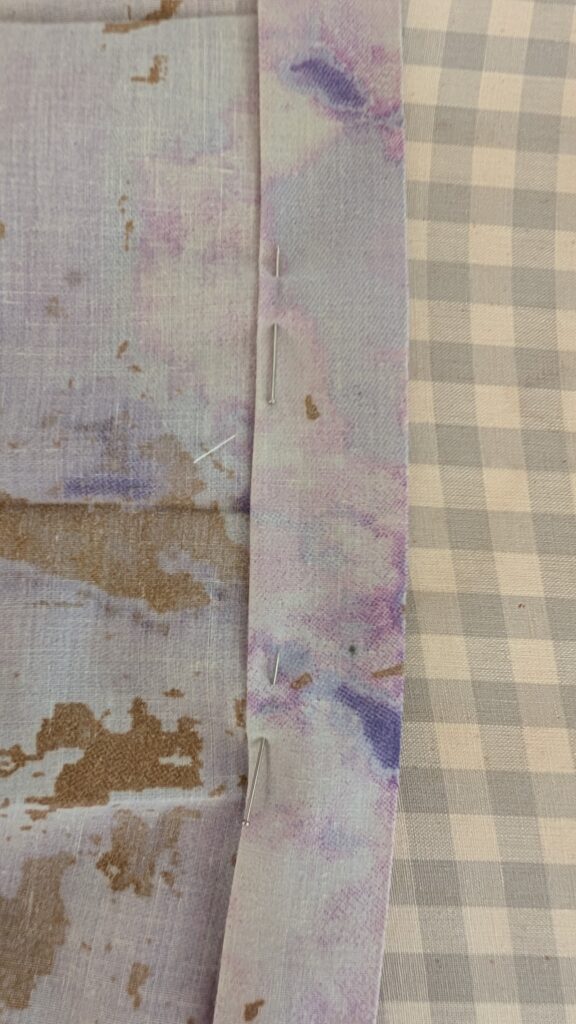
My choice of fabric is what inspired this dress. Sadly, my pattern pieces were so big that I couldn’t use this fabric. The feature strip would have only gone across the front. This is not good enough. For my second choice I had to pick a fabric with an all over print that worked in all directions. I still didn’t have enough fabric. So, I used calico for the one piece of lining. Since it is on the inside no one will notice. Many garments go use a cheap different lining in places people don’t see.
We are in the middle of autumn. Winter is almost here. I won’t be able to wear this dress until spring. Sadly, it will be my closest.
Leave a Reply